Plan your first three-day itinerary with PlanLo
Practise with a fictional three-day city trip. This example contains no real bookings, companion details or record of a visit. The aim is to handle dates, activities and backups separately, turning a list into arrangements you can check before departure. For a real trip, confirm transport, accommodation and opening hours with the operators.
Tested on 31 October 2026 with the PlanLo preview build of 31 October 2026
Prepare information before starting
Start on paper with your departure date, return date, accommodation area and labels for your companions. Use A and B instead of real names, and “test accommodation” instead of booking details. This keeps private confirmation codes and identity documents out of screenshots. Separate places you definitely want to visit from optional stops, and avoid filling all three days immediately. Estimate the time available on arrival and departure days separately.
Before opening the PlanLo travel journal, check whether this browser already contains an important itinerary. If it does, export a backup first, then practise in a separate test browser environment. Do not clear active data just to try a feature, or treat a private browsing window as a place for long-term storage.
Create dates and daily plans
Set dates and create days
Open “Pre-trip checklist” and choose “Edit dates and participants”. Set Start with “輸入開始日” and End (optional) with “輸入結束日(可選)”; these two buttons still have Chinese text in the English HTML. Choose three consecutive dates, then press “Create schedule”. Open “Schedule” and check that three day templates match your dates.
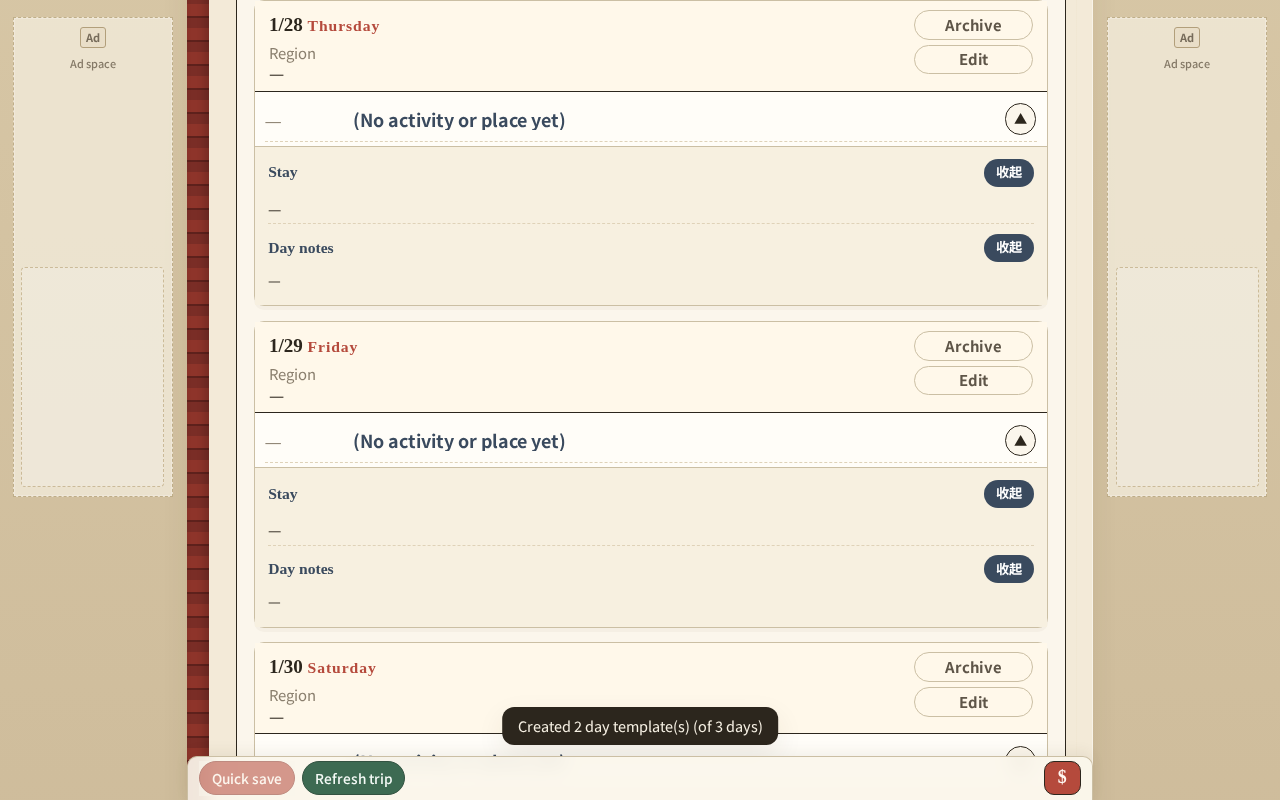
List three dates before adding activities
In your preparation notes, identify the start and end dates and label the days as arrival, a full sightseeing day and departure. Begin each day with one main activity, then add meals and breaks. This is a planning method: it does not mean the system checks transport or attraction opening hours for you. Keep your own verification notes before entering the arrangements.
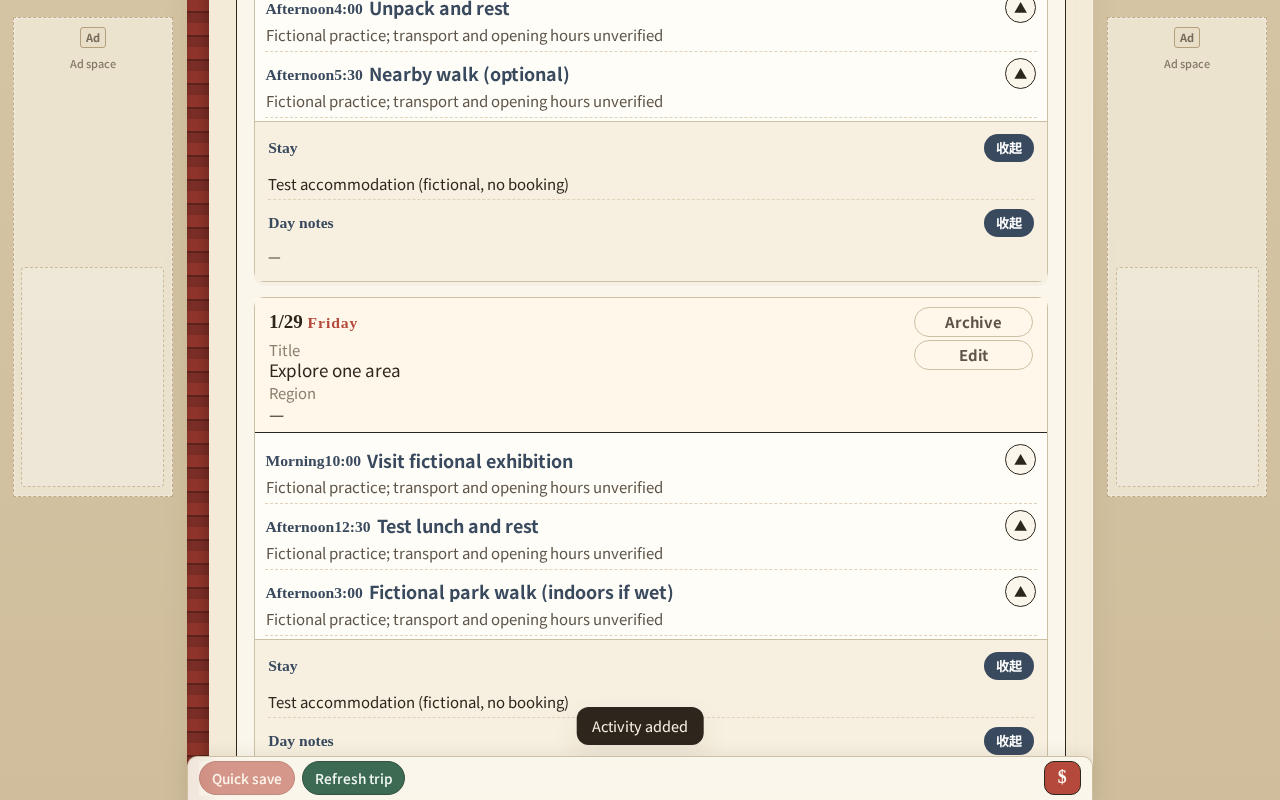
On day one, you might list travelling to the accommodation after arrival, sorting luggage and a nearby walk. Concentrate day two’s main activities in one area. On day three, keep only nearby activities that can be dropped easily. These are fictional test items, not an executable timetable for a particular city. After entering them, reread each day. Check that evening activities belong to the correct date and that you have allowed time to prepare for the return journey.
Add timed activities
In “Schedule”, choose “Edit” for the intended day, then “Add activity”. Select an insertion position and press “Add”. Enter the start time, end time, place and activity content on the new card. Use fictional items such as arrival, lunch and a nearby walk. Check the date and time before finishing the day edit.
Organise checklists, transport and accommodation
Build the preparation checklist
Return to “Pre-trip checklist” and press “Add item”. In “Add pre-trip item”, choose “Blank item”, enter a “Name” and, if needed, “Note (optional)” or “URL (optional)”, then press “Add to list”. Add a task to check accommodation cancellation terms. Keep unfinished tasks separate from timed activities.
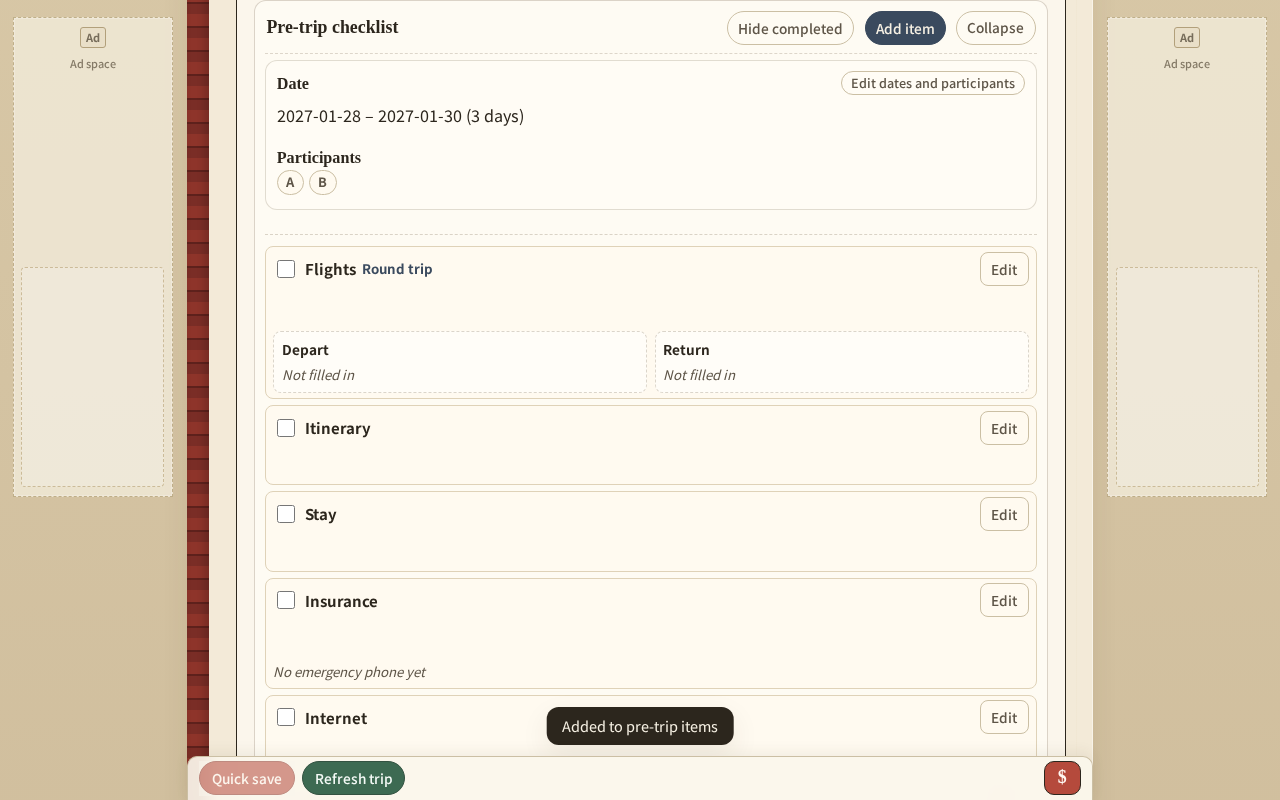
A preparation checklist records unfinished tasks, such as checking accommodation cancellation terms, downloading transport information and preparing offline copies. An activity list answers a different question: what will you do that day? Keeping these separate helps prevent “book the ticket” from being mistaken for an actual scheduled journey.
Record only the accommodation and transport information companions need: locations, dates, operators’ public websites and meeting arrangements. Keep confirmation codes, identity numbers and payment information in an appropriate private place. Before sharing an accommodation address, agree who may see it. Then inspect exported files and screenshots for unnecessary information. A private note does not automatically become suitable for sharing because it appears in an itinerary.
Check timing and travel buffers
Read each day as a complete route: accommodation to the first activity, then a meal and the next stop, and finally back to the accommodation. A map’s journey time may exclude walking to the station, finding exits, waiting, queuing and resting. Allow for the route, walking pace and luggage.
If a day is overloaded, remove optional activities first, then consider changing the areas you cover. Simply starting earlier does not resolve travel or energy limits. Write a wet-weather plan as an alternative, so the itinerary does not appear to require both versions. For activities requiring reservations, check dates, entry restrictions and cancellation arrangements separately.
Back up and save online after signing in
Export and save online
Open “Export backup / file” and choose “Backup file” for a restorable copy; “Excel” and “Print / PDF” are document outputs. For an online save, open “Cloud trip management”. The dialog is “Cloud trip / share”; signed-out users choose “Sign in”, then “Sign in with Google”. After signing in, choose “Upload new trip” and verify the saved name. Use “Quick save” for subsequent saving. “Restore from cloud to device” loads a selected save; “Refresh trip” reloads the current cloud trip and is not an upload or save button. Check the saved name and contents after saving, and verify restoration in a clean browser environment.
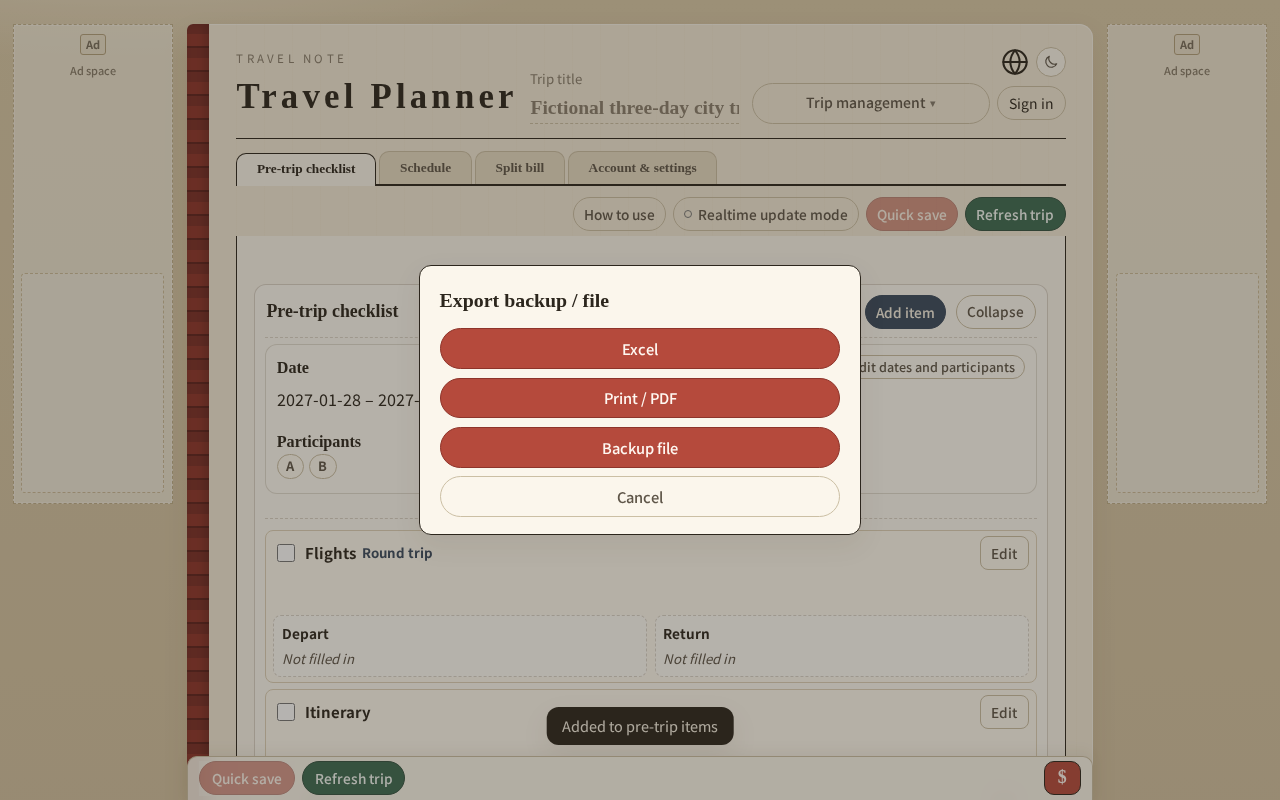
Distinguish three different actions
Local data stays in the browser you are using. After clearing site data or changing devices, do not assume the original itinerary will still be visible. Exporting a backup creates a separate copy for restoration. Store that file somewhere you can find and protect appropriately. Saving online after signing in requires following the tool’s actual saving process; do not assume every edit is automatically sent to the cloud.
Common operational questions
If data is missing on another device, first establish whether it remains only in the original browser. Then check the signed-in account and selected online save. Do not immediately clear data. If dates are wrong, check your entries and which day each activity belongs to. Before sharing, reread the itinerary as its recipient, checking whether names, accommodation and transport details are appropriate for that person to see.
Finish by restoring your own backup and checking it. Keep items that are still unbooked or unverified in your private working checklist. The itinerary’s usefulness should depend on what you have confirmed, rather than how many boxes appear filled.